Sunday, December 30, 2007

Sacrifice for your bread

The first time I made no-knead bread a month or so ago I didn't have an iron pot or a ceramic La Cloche to bake it in. So I baked it on my pizza stone covered with a pyrex bowl. Of course I have never used this mixing bowl in the oven before so my brain didn't even think that it would be 500 degrees hot when I grabbed it with my bare hands to plop it on top of the bread. I got some nasty burns on my fingers that are only just now about healed. Lesson Learned. I was so happy to get my Le Creuset pot for xmas as this is perfect for making no-knead bread in.

I took some liberties with the steel-cut oats no-knead bread from the breadtopia website. I actually started this bread a couple days ago. I'll first list all the ingredients then I'll tell you how I put it all together.

~0.75 cup sourdough starter
1.5 cups water
0.75 cup whole wheat flour
1.5 cup unbleached all purpose flour
0.5 cup steel cut oats
1.5 tsp salt

At 9:45 pm Friday evening I mixed together the starter, 1 cup water, 0.5 cups each of all purpose flour and whole wheat flour. This was mixed well, covered with plastic, and allowed to sit at room temperature. My starter was directly out of the fridge and had not been refreshed so I wanted to give this bread time for the starter to come alive.

The next day around 1:00 pm I mixed into the wet bubbling starter mixture another 0.5 cups of water, 1 cup of all purpose flour, 0.25 cups whole wheat flour, the steel cut oats and the salt. This was mixed well and allowed to sit out at room temperature for an hour. At that time I slightly kneaded the dough (ok, so maybe not completely no-knead). I simply folded the sticky dough over onto itself a couple dozen times right in the bowl. I didn't want this dough to ferment too fast so I put it in the fridge for a nice overnight slow rise.

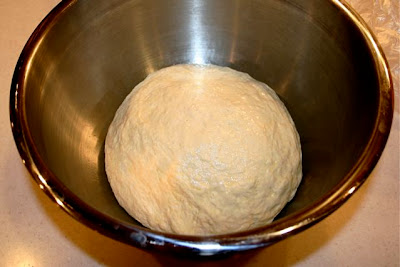
This morning at 6:00 am I took the dough out of the fridge and let it warm up. I scraped the dough out onto a lightly floured board, gave it a few turns and shaped it into a ball. This was plopped onto a piece of parchment paper and placed in a bowl. I covered it with a plastic bag and left it to do it's thing. After 3 hours it had risen nicely. I heated up my Le Creuset in a hot 500F oven. Now I had been warned that the phenolic knobs on the Le Creuset are only rated oven proof up to about 350-400 degrees so I took the handle off before heating it. Once heated the bread was baked according to instructions - first 30 minutes with the lid on, then slightly reduce the temp to 450 and bake for another 15 minutes. The bread turned out great.

The handleless Le Creuset lid, however, was a bit unwieldy. As I was wrestling it off the pot at the 30 minute time it slipped and immediately seared a nice brand into the side of my hand. Sacrifice for the bread, I say! Two for two is too much. No more. I immediately went out on the web in search of a replacement knob. I found a Le Creuset stainless steel knob for $10 and promptly placed my order.

Saturday, December 29, 2007

Garlic Beef

This evening I opened up a very unusual and interesting French wine from Languedoc. Minvervois to be specific. I thought this vegetative and peppery wine would go great with some Asian influenced beef. So I made a garlic beef dish served with steamed baby bok choy. I thinly sliced some ribeye steak and mixed it up with half an onion, quartered and sliced. I also added a head of garlic chopped, a splash of soy, mirin and a good shake of cornstarch. Oh, and some black pepper. This was simply stir fried in a wok until just under cooked. I added about 1/4 cup of water and covered it to let the sauce form from all the starch. It turned out pretty good. Quick and easy too. The wine matched perfectly.

*edit: I also added a healthy amount of chopped fresh ginger to the mix.

Friday, December 28, 2007

Leftover Sourdough Focaccia

Yesterday was feeding day for my sourdough starter. As usual I hate to throw away perfectly lively babies so I used it to make a focaccia. I didn't really follow a recipe and certainly didn't measure anything. But it turned out pretty good anyway. I took almost a cup of sourdough starter and added about a cup of water to it. To that I added a tsp of salt and about two cups of all purpose flour. This was mixed up well, covered with plastic wrap and allowed to sit for a couple hours. After that I kneaded the wet dough in the bowl by folding it over on itself about 15-20 times. This was allowed to rise for another 3 hours. The very wet dough was poured out onto a sheet pan lined with parchment. I had doused the parchment paper with a liberal tbsp or more of good olive oil. I stretched the dough out thin with oiled fingers. It was a very nice texture - very pliable and relaxed. It stretched beautifully. I splashed the top with more olive oil to liberally coat it and then sprinkled it with coarse salt and a blend of dried basil, oregano and rosemary. This was covered with plastic wrap and allowed to rest for about an hour. I popped it into a 450F oven for about 15 minutes until the top just started to show hints of brown. The bread turned out better than I expected. The texture was nice and chewy and the oil made it slightly crispy. My first try at focaccia and it turned out pretty good.

Thursday, December 27, 2007

To brine or not to brine

That is the question. Well, frankly, I prefer brining my poultry as it makes for a juicier and tastier bird. Here is a simple everyday chicken soaking in a mixture of sugar, salt and spices. For this three pound bird I let it brine for about 3 hours. A very good rinse in lots of fresh water and it was patted down with towels to dry it off. I rubbed the skin with a bit of butter and sprinkled it with salt and pepper. The bird was placed on top of a bed of carrots onions and celery in my favorite Revol chicken roaster. I set the oven to 450F to roast this at a high temperature. Once the internal temperature reached 170F I took it out, covered it with foil and let it rest for about 20 minutes.

This day I also spent a few hours cleaning out my pantry. I have lots of different kinds of dried beans and grains on hand so I thought I would make a medley of healthy grains to serve with the chicken. There's kamut and red beans and mung beans and bulgar wheat and wheat berries and spelt and thai brown rice and yellow somethings and black eyed peas and black beans and lots of other things I had. These were soaked for a few hours before being thrown into my rice cooker and cooked on the "brown rice" setting.

Tuesday, December 25, 2007

Happy Holidays

I have been quite busy over the holidays and have lots to post in the coming weeks. Santa was good to me as you can see above. I hope everyone has a wonderful holiday and a terrific 2008.

Thanks for reading. Be back soon.

Tuesday, December 18, 2007

Dinner to Decorate By


Last evening we finally got around to decorating our holiday tree so dinner was pretty quick and easy. A simple burger made very flavorful was on the menu last evening. It was served with a butternut squash soup and an acidic red wine from Michigan. Sweet maple syrup was the theme. The meat was seasoned with some maple syrup as well as salt and pepper. This was topped with melted cheddar cheese served on a whole wheat bun with mayonnaise (Helman's, please) and dijon mustard.

The soup started with an oven roasted butternut squash. The sweet flesh was added to a pot of sautéed onions and garlic. About 6 cups of chicken stock was added and it was flavored with some maple syrup.


After this had simmered for a little bit a splash of heavy cream was added and it was all whirled up together. Slightly sweet with just a dusting of fresh grated nutmeg to complement the maple.


Some of our decorations - ceramic doves placed over the lights glow nicely while perched on the branches. A crystal holly and angels also can be found along with many other eclectic pieces from our past.


Betty and Me

We have a very old relationship going back at least 30 years. This belonged to my mother. She became ill with MS when I was quite young so the holiday cookie baking fell upon my shoulders. With Mom's guidance and Betty to tell what to do I was able to put together quite an array of holiday treats. Mom is gone but Betty remains in my kitchen to help me along.


I have had requests for Betty's Cranberry Drop Cookies. They are so easy peasy to make that even a child can do it! Here's the well worn page that still keeps me on track year after year. As I mentioned in the previous entry below, I don't have my mother's 'Chef Moule' hand cranked grater that I always used to perfectly chop the cranberries. The food processor worked but it just isn't quite the same. If you can't read the recipe just click on the picture for a larger version.

Monday, December 17, 2007

Cookie Baking Bonanza

I've finally got around to doing some holiday baking. I had a great weekend and the whole family pitched in. DW made snickerdoodles. I haven't had these for years. They turned out crispy and delicious.


Of course a staple around the holiday season are peanut butter Hershey's Kiss cookies. I made these quite large to enjoy the peanutiness in all its glory.


My favorite xmas cookie is this wonderful tangy and sweet cranberry walnut cookie. I got the recipe from my mothers old tattered and torn Betty Crocker Cookie Book. I remember making these by the truckload when I was a kid. So easy to do. A simple drop cookie. The only thing is I don't have my mother's old "Chef Moule" hand cranked grinder to chop the cranberries. It always did a terrific job. The food processor does not get them all even.


Saturday, December 8, 2007

My Muhammara


This evening I'm heading out to a party and I was looking for something to bring as an appetizer. When Clotilde over at the Chocolate & Zucchini blog posted a Middle Eastern roasted red-pepper and walnut dip called muhammara I knew I found my dish. I followed Clotilde's recipe and it came out delicious. I didn't have any pomegranate molasses so I made my own version. I took the seeds of half a pomegranate and cooked them up with a couple tablespoons of sugar. I crushed them up well and strained it off. It had a nice flavor so I think it was ok. No smoked salt either but I added a wonderful smoked paprika that I have from Spain. The roasted red peppers were so sweet and the walnuts and cashews are so rich. The cumin adds a nice spice that mingles with the smoky paprika. I think people will like it.

Monday, December 3, 2007

Salmon Cakes

I was looking for something quick and easy to make on a Sunday evening with a fridge that desperately needs stocking. I started rummaging through my pantry and found a box of Japanese buckwheat noodles and a 15 oz can of salmon. So I threw this together in a jiffy. It came out pretty good. I wish I had something to garnish it with. No fresh herbs or scallions to speak of here.

For the crab cakes I used one large can of salmon, about 1.5 cups of crushed up Ritz crackers (love the buttery flavor), the zest of one whole lemon, two eggs, salt, pepper and about 1/2 teaspoon of Old Bay seasoning. These were mixed up gently and shaped into patties. They were quickly fried in olive oil until brown and crispy.

I served them on a cold soba salad. I cooked the noodles just until tender and cooled them. I also finely shredded some romaine lettuce (that's the only thing green I had in the house). This was flavored with a bit of sesame salad dressing and bit of spicy Korean red chili paste (gochujang).

Friday, November 30, 2007

Fargo Sourdough

Remember the pizza I made a while back? I made it from the discarded starter I was feeding and building up to make my first batch of home made bread using my own culture. No commercial yeasts here. I actually made the bread on Thanksgiving day but am just getting around to blogging about it. Bread is alive! That's what I love about it. I am proud to have been able to leaven my own bread using yeasts from my local environment. It turned out with so much flavor from the long fermentation that I will definitely be doing this again. Here's the story of my Fargo Sourdough.

On Tuesday evening I took a cup of the active sourdough sarter and mixed it with 3 cups of flour and two cups of water. I mixed it well, covered it, and left it to ferment. After 22 hours, this is what I got. A wet dough sponge that was frothy and bubbly.

To the bubbly sponge, I added 1 and 1/2 tablespoons of salt, 1 and 1/2 cups of water and about 7 cups of flour. This was mixed together and allowed to rest for about 30 minutes.

Once the dough had a chance for the moisture to permeate the newly added flour I tipped it out onto the counter and kneaded it by hand for about 10 minutes until it was smooth and elastic. This was shaped into a ball and placed in a well oiled large bowl. definitely be doing this again. It was covered with a plastic bag and placed in my cool basement to rise overnight. The next morning, after about 10 hours, the result was a well risen dough that reached to the top of the bowl.

The dough was gently tipped out onto the counter being careful not to deflate it too much. It was divided into four and shaped into loaves. They were covered and allowed to rise for about 2 and a half hours. The dough was placed on a peel, slashed, and baked on a stone in a 450 °F oven two loaves at a time.

In order to provide the right texture to the crust and get maximum oven spring you need to have a humid oven at the beginning of baking. This is difficult to control in a home oven. I have good luck by first throwing a half cup of water onto the hot oven floor just before adding the bread. I then load the dough onto the baking stones and add another cup of water thrown onto the floor. After a few minutes I add another cup of water and then let it bake until the crust is nicely browned - about 20-30 minutes depending on the size of the loaf.

The result was wonderful if I do say so myself. The crumb was not too big but certainly big enough. The crust was chewy and flavorful. The interior was still moist and soft. The bread was not sour like San Francisco sourdough. I guess Fargo flora are less acidic than that from the west coast. I like to think that my Fargo sourdough is more akin to traditional French sourdoughs. At least the bread was spot on what I hoped for.

Thursday, November 29, 2007

TD6 - Curried Turkey Salad

Yes it is day six of turkey leftovers. Let's see. On day 1 I had just turkey leftovers. Day 2 featured turkey soup. Day 3 had more of the turkey soup. Day 4 was when I made those turkey carnitas. Day 5 was a grilled turkey melt sandwich. Today we feature a turkey salad. Not any ordinary turkey salad, but one flavored with curry powder. This is my favorite way to enjoy turkey salad. I mixed it up with some carrots, green apples, walnuts, dried cranberries and mayonnaise. This was flavored with a good dose of Madras curry powder, salt and pepper. Plopped onto a bed of romaine lettuce.

I don't usually cook desserts but I was inspired by Giada who made a simple elegant cookie. She spread out a sugar cookie dough in a pan and baked it just until lightly golden brown. She topped it with some orange marmalade, chopped hazelnuts and almonds, and then drizzled it with chocolate. I set out to copy this but all I had on hand was some citron marmalade. It filled in nicely for the orange. I also added pecans to the nut mix. Mine didn't come out nearly as pretty as Giada's. My chocolate simply refused to drizzle so I just slathered it on top with a spoon.

Monday, November 26, 2007

What else is there to do with it?

Since I had to cancel Thanksgiving and I still had to roast my 18 pound bird, we've been feasting on turkey for a few days now. What can you do with leftover turkey? There's tetrazzini, turkey soup, turkey sandwiches, turkey chili, turkey stirfry, turkey pasta, turkey pot pie, turkey salad. Yes, the list is endless. I've had plenty of the soup and sandwiches. Tonight I had a hankerin for mexican flavors. And I wanted to make something quick. So I threw this together.

What to call it? Hmm . . how about Cheezy Turkey Carnitas on Sweet Potatoes. Yeah, that sounds good.

I slivered an onion and chopped 4 cloves of garlic and cooked them until good and done. I added some finely sliced celery (it's what I had in the fridge). I also threw in some freshly ground cumin and corriander along with some red chili powder and a nice smokey hungarian paprika. Toasted the spices for 30 seconds and threw in the shredded turkey. Once heated through I deglazed the pan by adding about 1/3 a bottle of Corona beer. Salt and pepper to season and a half cup of tomato sauce. I let that simmer just for a bit. Spooned it over halved already baked sweet potatoes. Topped it with some cheddar cheese and popped it into a 375 oven for about 15 minutes. It was pretty tasty. Would have been better if I had some sour cream and fresh salsa to go with it. I desperately need to get to the grocery store.

Saturday, November 24, 2007

It's just French Toast

But French toast can be so good. I've been quite sick for the last couple days. So sick I had to cancel my Thanksgiving dinner and tell all my guests not to come. I have hardly eaten anything in the last two days and woke up this morning HUNGRY! Well, on Thanksgiving day I did bake four loaves of the best bread I've ever made. From my own sourdough starter. I'll post about that later. But I have all this bread that never got eaten. I decided to make a simple French toast this morning. An egg, some milk, some cinnamon, cardamom, and nutmeg and this is what you get. I topped it simply with some frozen strawberries that had been heated in the microwave. Nothing fancy, not too sweet, but oh so satisfying.

Wednesday, November 21, 2007

Seafood and Barley Risotto

This evening I have been prepping some things for tomorrow's thanksgiving feast. I was trying to decide what I could make easily for dinner. Then I happened upon a bag of pearled barley in my pantry. Hmm, what to do with it? I wonder if I could make a risotto out of it. It would be healthier than rice. As long as I could get that creamy texture from the starch, it should be ok. So, I sautéed some onions and garlic in olive oil until softened and then added a couple cups of the barley. I added a few cups of heated seaweed broth I had leftover from a shabu shabu dinner last week. The first picture shows the risotto in the early stages after the first addition of broth. I also added some dried thyme, dried parsley and some Spanish saffron to flavor the dish.

I continued to cook it slowly adding a cup of broth whenever it got dry. This took about 50 minutes until the barley became tender and a creamy texture was developed. I then added two tilapia filets (thawed and cut into pieces), about a cup of small frozen bay scallops and about 20 medium sized shrimp. I made sure to have enough liquid present so I could cook it covered for about 5 minutes. This was the result!

The risotto has a wonderful toothsome texture while maintaining a creamy quality that you would expect from a risotto. Not exactly the same as an excellent starchy rice but pretty good. The tilapia was nicely mild enough in flavor so as to not overwhelm the subtle saffron aromas. The seaweed broth provided a nice flavor of the sea. I forgot to mention the broth was also seasoned with a bit of a clam dashi (broth powder) that I picked up at my local Asian market. Overall I would have to say this was a successful and satisfying substitute for a classic risotto.

Pizza Pizzazz

I am on such a bread making kick lately and my sourdough starter has been bubbling away like mad. I have been feeding it well over the last week to get it very active for my thanksgiving bread baking. Of course, when you feed starter you need to throw some out each time. I hate to kill my babies. So, I decided instead to use the extra for pizza dough. Pizza is really easy and you can do just about anything with it. I just top it with whatever I have around at the time. My dough was made solely from flour, salt, water, a bit of oil, and my starter.

Here are the ingredients I scrounged up for this batch of pizza:

Chopped garlic, dried oregano and basil, salt, pepper, pastrami, kalamata olives, fresh tomato slices and fresh mozzarella.

I didn't use a sauce on this on as I wanted the flavor of fresh tomatoes to dominate. But I do often use a simple tomato sauce.

First step is to stretch the dough into a round. This is the most fun part! You get to feel the dough. Pull it. Toss it if you dare. But get it flattened out and ready to go. I brushed this with olive oil and sprinkled on the herbs, salt and pepper. I always brush my dough with oil even if I'm using sauce to prevent the dough from getting to wet from the ingredients that top it.

This was topped with the fresh tomato, fresh chopped garlic, olives, pastrami and fresh mozzarella. Of course you can add just about any ingredient you like. Early in my pizza making days I made the mistake of piling on too many ingredients. Go light. Don't overdo it. Otherwise your pizza will be too heavy, too thick and will not cook well.

Here's the final product after being baked for about 10 minutes in a hot (500 degree) oven. Of course I use a baking stone to get that crispy crust.

bon appetit

Sunday, November 18, 2007

A Kimchee Tutorial

I don't know that there is a more versatile condiment than kimchee. This staple of the Korean diet is made from napa cabbage that is allowed to ferment with red pepper. You can eat it with rice. You can eat it in soups. You can fry it up in a savory pancake batter. Anyway you like your kimchee, its sweet, spicy, and sour flavors will add to nearly any dish. Kimchee is actually easy to make and there is no substitute for fresh homemade stuff. There are as many ways to make kimchee as there are homes in Korea. Everyone has their own family recipe so you really can't go wrong. I have a dear friend from Korea who taught me this simple way to make kimchee using fresh ingredients.

For my batch of kimchee I will be using the following:

2 large heads of napa cabbage
1 cup of salt
2 bunches of green onions
2 heads of garlic
about 2 inches of fresh ginger
about 2 cups of Korean red chili flakes
about 1/4 cup of Vietnamese nuoc mam fish sauce.

I would say the most important ingredient for getting the right flavor is the Korean red pepper. I have tried other red pepper powders but nothing else will give you that authentic taste. My kimchee uses a lot (2-3 large fistfulls). It is spicy but not really that spicy. Korean red pepper has a wonderfully sweet fruity taste that accompanies the spice. It is no where near as hot as a cayenne pepper. So don't be shy about using this much. I buy it in large bags from my local Asian grocery.

To prepare the cabbages I first cut them into quarters so I can easily wash and drain them. They are then cut into pieces. You can cut them whatever size you want. I prefer them about 2 inches or so. I layer the cabbage pieces salting the layers liberally. This is allowed to sit for a couple of hours. The cabbage will drain off some of its water and will shrink in volume by about 1/3. The cabbage should be rinsed very well with cold water to remove as much salt as possible and drained.

Chop the garlic finely and mince the ginger. The onions should be cut on a bias. I prefer them about 1/2 inch in size but you can cut them larger or smaller to your liking. Mix all the rest of the ingredients together well. I find that my hands work best for mixing all the ingredients. Kimchee recipes usually have some kind of fish flavor. Some call for the addition of raw oysters. Some for the brine from fermented shrimp. I find that the Vietnamese nuoc mam sauce does a great job of imparting that subtle but not overpowering flavor of the fish. The sauce smells awful on its own but you will not taste it in the kimchee. Trust me. The kimchee will not be right without it. You can use more or less to taste. If I have it I usually add a splash of the juice from my last batch of kimchee to make sure the good souring bacteria are present.

Pack the kimchee tightly into a large jar or any non-reactive container you have loosely covered. Leave this sit at room temperature for 2-3 days and then store in the refrigerator. Be careful that your container has enough room at the top to allow the gases to escape. My jar shown above is probably too full and likely to spill kimchee liquid out of the top as it ferments. Kimchee will slowly ferment in the fridge. You can eat it as soon as you like. The younger it is the sweeter the cabbage tastes. If you like it more sour just let it sit longer. Actually you should try tasting it at different stages to see how it changes. In Korea they eat fresh kimchee as well as fermented kimchee. I like to let some kimchee stay in my fridge for months so I have some really sour stuff to cook with.

Saturday, November 17, 2007

Whole Wheat Sourdough Onion No-Knead Bread

If you haven't heard about the no-knead bread craze popularized by a New York Times article last year, you are missing out. Dirt easy to make and wonderfully crusty and delicious, no-knead bread is very amenable to modifications. Of course for my first attempt I couldn't do just a simple white bread. I had to doctor it up. The basic recipe ingredients for the standard bread are:
3 cups flour
1 1/2 tsp salt
1/4 tsp yeast
1 1/2 cup water

That's it! Just mix it up, cover it with plastic, and let it rise for about 18 hours. Fold the dough a few times and let it raise in a bowl with a floured towel inside. Let it rise again for a couple of hours. Pop it into a hot cast iron pot in a 500 degree oven. Bake it for 30 min covered and 15 minutes at 450 degrees uncovered.

For my bread I substituted one cup of all purpose flour with 1 cup of whole wheat flour. I added 1/2 cup of dehydrated onions and 1/2 cup of my sourdough starter that I have been culturing for a couple of months. I was very pleased with the results. It has a terrific chewy crackly crust and a soft moist interior. I let the second rise go for 2.5 hours but it probably could have risen even more.

For video tutorials on the no-knead bread method (and lots of other good information about bread) check out the breadtopia web site.